


“Superior Lithium Performance” EPOCH 51.2V (48V) 105AH - Golf Cart Battery - Complete Kit
“Superior Lithium Performance” EPOCH 51.2V (48V) 105AH - Golf Cart Battery - Complete Kit
Couldn't load pickup availability
Your payment information is processed securely. We do not store credit card details nor have access to your credit card information.

Description
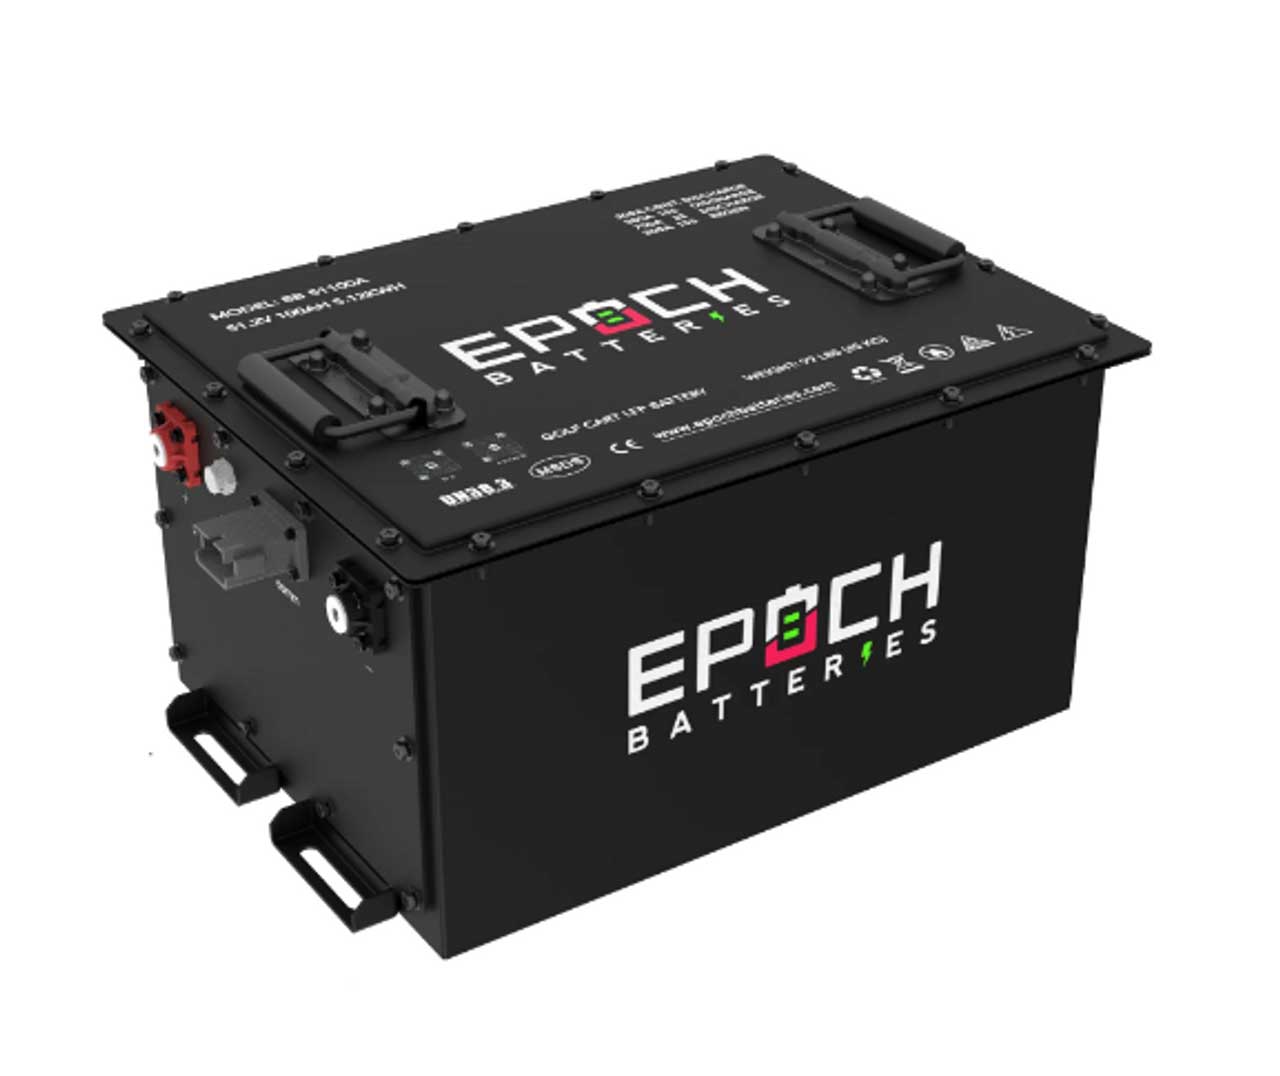
 Upgrade your golf cart with the 48V 105Ah Lithium (LiFePO4) Golf Cart Battery - Complete Kit. This kit offers a high-performance, reliable power solution designed to extend the lifespan and efficiency of your golf cart.
Features:
- Complete Lithium Conversion Kit
- Bluetooth App (iOS & Android) with over the air firmware updates available
- 200A Max Continuous Discharge
- 300A @ 15s, 700A @ 2s Peak Discharge
- 100A Max Continuous Charge
- 300A @ 15s Peak Charge/Regen
- 3,500 Cycle Life
- 11 Year Warranty
What's Included:
- 48V 15A Lithium Charger
- Battery Gauge
- 12V Converter
- Cart Specific Mounting Brackets
Weight & Dimensions
- Weight: 99 lbs.
-
Dimensions
- Length: 18.1 (inches)
- Width: 13.4 (inches)
- Height: 9.8 (inches)
Specifications
-
Configuration
- Cell Configuration: 1P16S
- Chemistry: LiFePO4
-
Current
- Max Continuous Discharge Amps: 200A
- Max Charge Current Amps: 100A Continuous, 300A @ 15s
- Max Discharge Peak Current Amps: 300A @ 15s, 700A @ 2s
- Series | Parallel: Max (2) in Parallel
-
Voltage
- Voltage: 51.2V
- Max Charge Voltage: 58.4V
- Operating Voltage Range: 40 - 58.4V
-
Temperature
- Charge Temp Range: 0°C (32°F) / 55°C (131°F)
- Discharge Temp Range: -20°C (-4°F) / 60°C (140°F
- Storage Temp: 0°C (32°F) / 35°C (95°F) (Max 12 Months)
Installation Steps
*ATTENTION: Before installing, make sure that all appliances are turned off.*
- Open the golf cart compartment, you will see your original lead-acid batteries. Disconnect all the wires safely and pull out your old lead acid batteries.
- Fasten the bracket we offer in the compartment as the base.
- Install the charger into the compartment.
- Replace your old receptacle with the new one we offer (for safety, this step is necessary).
- Install the gauge and ON/OFF switch on dashboard of your cart.
- Install the wiring harness which will be used to connect battery communication port, charger, on/off switch, and gauge.
- Put the battery pack into compartment and fasten the pack to the bracket base.
- Connect wiring harness with battery and charger, on/off switch, and gauge.
- Connect Battery Positive and Negative Terminal to Positive and Negative of the Charger.
- Connect Battery Positive and Negative Terminal to Positive and Negative of your cart.
- Connect the wiring harness to Battery Communication Port, ON/OFF Switch, Gauge and Charger.
- Now you can turn on the ON/OFF Switch to check whether everything is well connected.
- If the battery is low power, then you need to charge it at first (You can use the plug we offer). All installation steps are complete, and your carts is ready to go. Note: Press and hold the “External On/Off SWITCH” button to turn on/off the battery. Green light indicates power on. Note: only authorized mechanics or technicians are allowed to install the battery.
Why Plum Quick?
We're proud of our history with high performance electric golf cart motors. We manufacture and back high performance products!
** 50+ Years in Business
** Family Owned & Run
** 100% USA Built Products
** 75,000+ Motor Sales
** Golf Cart Top Speed and ET Track Records at Multiple Sanctioned Tracks
** 2-Time Guinness World Record Holder “Fastest Golf Cart
** Multiple NEDRA “National Electric Drag Racing Association” World Record Holder
** First Drag Racing Golf Cart Ever Built to Compete on IHRA “International Hot Rod Association” Sanctioned Tracks